ArgoCD의 ApplicationSet에 대해서 그동안 다뤄봤습니다.
이번에는 추가적으로 OpenLDAP, KeyCloak, Jenkins, ArgoCD를 통합 설정하여 CI/CD 플랫폼을 관리하기 위한 구성을 해보겠습니다.
해당 구현으로 다 수의 사용자 인증 부터 권한관리 까지 체계적으로 구성할 수 있어 미승인 사용자를 차단하고 권한부여된 사용자가 적절한 액션을 취할 수 있도록 할 수 있습니다.
Cluster 구성
이전 블로그에 있는 멀티 클러스터환경에 이어서 진행하겠습니다.
https://hanship.tistory.com/5 포스팅을 참조해서 클러스터 구성을 해줍니다.
KeyCloak 설정하기
cat <<EOF | kubectl apply -f -
apiVersion: apps/v1
kind: Deployment
metadata:
name: keycloak
labels:
app: keycloak
spec:
replicas: 1
selector:
matchLabels:
app: keycloak
template:
metadata:
labels:
app: keycloak
spec:
containers:
- name: keycloak
image: quay.io/keycloak/keycloak:26.4.0
args: ["start-dev"] # dev mode 실행
env:
- name: KEYCLOAK_ADMIN
value: admin
- name: KEYCLOAK_ADMIN_PASSWORD
value: admin
ports:
- containerPort: 8080
---
apiVersion: v1
kind: Service
metadata:
name: keycloak
spec:
selector:
app: keycloak
ports:
- name: http
port: 80
targetPort: 8080
---
apiVersion: networking.k8s.io/v1
kind: Ingress
metadata:
name: keycloak
namespace: default
annotations:
nginx.ingress.kubernetes.io/rewrite-target: /
nginx.ingress.kubernetes.io/ssl-redirect: "false"
spec:
ingressClassName: nginx
rules:
- host: keycloak.example.com
http:
paths:
- path: /
pathType: Prefix
backend:
service:
name: keycloak
port:
number: 8080
EOF
# 확인
kubectl get deploy,svc,ep keycloak
kubectl get ingress keycloak
NAME CLASS HOSTS ADDRESS PORTS AGE
keycloak nginx keycloak.example.com 80 19s
# 도메인 설정
## macOS의 /etc/hosts 파일 수정
echo "127.0.0.1 keycloak.example.com" | sudo tee -a /etc/hosts
# keycloak 웹 접속 : admin / admin
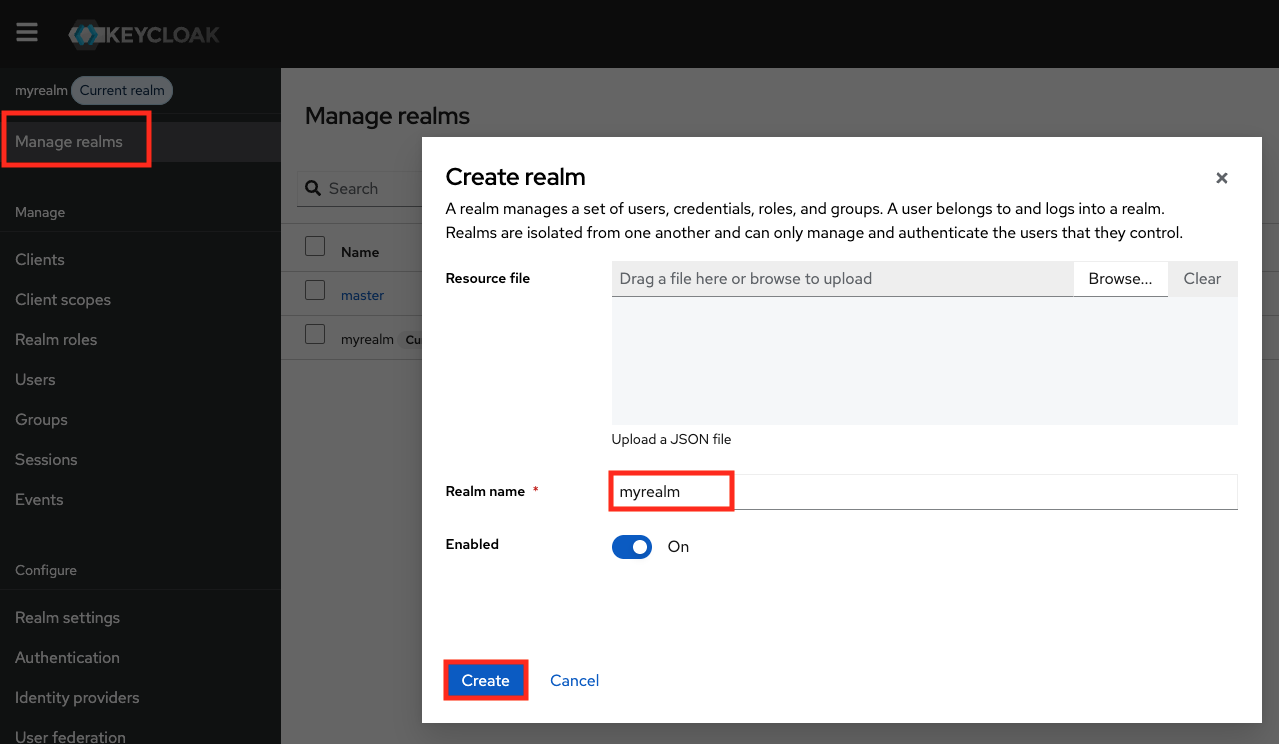
open "http://keycloak.example.com/admin"keycloak realms과 users를 생성합니다.
 |
 |
 |
 |
| realms 생성 | user 생성, 현재 realms 확인 | 비밀번호 설정(Credential에서 확인) | 비밀번호 설정 |
- realms 생성 : myrealm
- users 생성 : alice - 암호 alice123
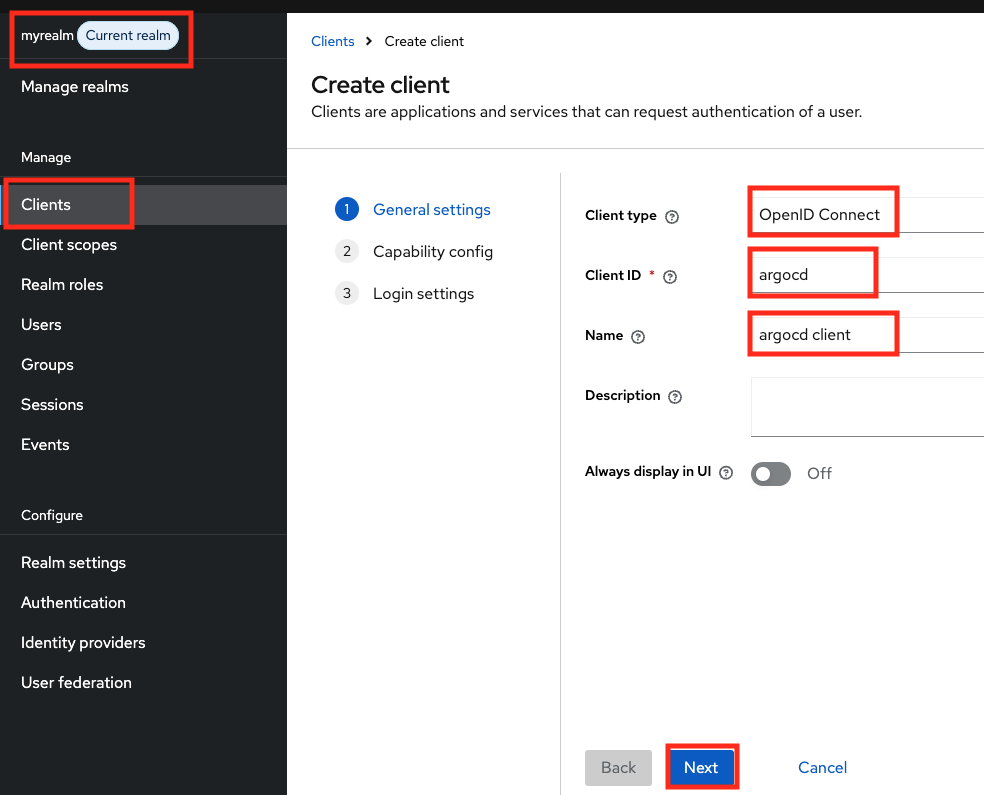
keycloak에서 argocd 를 위한 client을 생성합니다.
 |
 |
 |
 |
- client id : argocd
- name : argocd client
- client auth : ON
- Root URL : https://argocd.example.com/
- Home URL : /applications
- Valid redirect URIs : https://argocd.example.com/auth/callback
- Valid post logout redirect URIs : https://argocd.example.com/applications
- Web origins : +
- 생성된 client 에서 → Credentials : 메모 해두기 3QhTVm6g4Bp3EOJGDyCII4XEwITJxXwn
위 설정을 한 후 아래의 명령어를 통해 잘 설정되었는 지 확인해봅니다.
curl -s http://keycloak.example.com/realms/myrealm/.well-known/openid-configuration> | jq
...
  "mtls_endpoint_aliases": {
    "token_endpoint": "<http://keycloak.example.com/realms/myrealm/protocol/openid-connect/token>",
    "revocation_endpoint": "<http://keycloak.example.com/realms/myrealm/protocol/openid-connect/revoke>",
    "introspection_endpoint": "<http://keycloak.example.com/realms/myrealm/protocol/openid-connect/token/introspect>",
    "device_authorization_endpoint": "<http://keycloak.example.com/realms/myrealm/protocol/openid-connect/auth/device>",
    "registration_endpoint": "<http://keycloak.example.com/realms/myrealm/clients-registrations/openid-connect>",
    "userinfo_endpoint": "<http://keycloak.example.com/realms/myrealm/protocol/openid-connect/userinfo>",
    "pushed_authorization_request_endpoint": "<http://keycloak.example.com/realms/myrealm/protocol/openid-connect/ext/par/request>",
    "backchannel_authentication_endpoint": "<http://keycloak.example.com/realms/myrealm/protocol/openid-connect/ext/ciba/auth>"
  },
  "authorization_response_iss_parameter_supported": true
...
ArgoCD OIDC 설정을 진행합니다. (클라이언트 시크릿 설정)
# oidc.keycloak.clientSecret 에서 메모해둔 Credentials 입력
kubectl -n argocd patch secret argocd-secret --patch='{"stringData": { "oidc.keycloak.clientSecret": "3QhTVm6g4Bp3EOJGDyCII4XEwITJxXwn" }}'

# 확인
kubectl get secret -n argocd argocd-secret -o jsonpath='{.data}' | jq
...
  "oidc.keycloak.clientSecret": "M1FoVFZtNmc0QnAzRU9KR0R5Q0lJNFhFd0lUSnhYd24=",
...
argocd 에서 keycloak authentication 를 활성화 할 수 있도록 설정해줍니다.
kubectl patch cm argocd-cm -n argocd --type merge -p '
data:
  oidc.config: |
    name: Keycloak
    issuer: http://keycloak.example.com/realms/myrealm
    clientID: argocd
    clientSecret: 3QhTVm6g4Bp3EOJGDyCII4XEwITJxXwn
    requestedScopes: ["openid", "profile", "email"]
'

# 확인
kubectl get cm -n argocd argocd-cm -o yaml | grep oidc.config: -A5
argocd server를 재시작 해줍니다.
kubectl rollout restart deploy argocd-server -n argocd
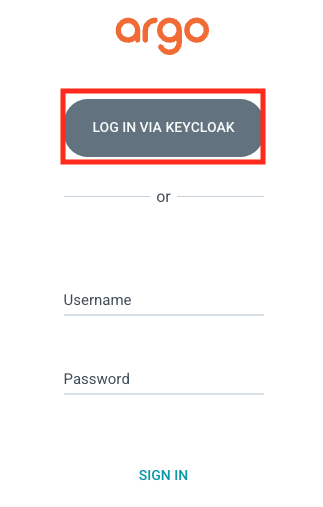
이렇게 한 후 argocd 에서 로그인을 해봅니다. LOG IN VIA KEYCLOAK 이 활성화 된 것 을 볼수 있습니다.
keycloak 으로 로그인하기를 클릭하면 아래와 같은 에러가 발생합니다.
failed to query provider "<http://keycloak.example.com/realms/myrealm>": Get "<http://keycloak.example.com/realms/myrealm/.well-known/openid-configuration>": dial tcp 127.0.0.1:80: connect: connection refused
keycloak으로 로그인 시 http://keycloak.example.com/realms/myrealm redirect 하는데 Host Mac에서는 해당 도메인이 접근되지만 kubernetes 환경에서는 해당 도메인에 대한 정보가 없기 때문에 접근을 할 수 없어 connect: connection refused 가 발생합니다.
ArgoCD가 **keycloak.example.com** 에 접근하지 못하는 경우, CoreDNS의 hosts 플러그인으로 클러스터 내부 IP로 매핑이 필요하기에 아래와 같이 설정을 해줍니다.
KEYCLOAK_IP=$(kubectl get svc -n default keycloak -o jsonpath='{.spec.clusterIP}' 2>/dev/null)
ARGOCD_IP=$(kubectl get svc -n argocd argocd-server -o jsonpath='{.spec.clusterIP}' 2>/dev/null)
kubectl patch cm coredns -n kube-system --type json -p="[
{
\"op\": \"replace\",
\"path\": \"/data/Corefile\",
\"value\": \".:53 {\\n errors\\n health {\\n lameduck 5s\\n }\\n ready\\n kubernetes cluster.local in-addr.arpa ip6.arpa {\\n pods insecure\\n fallthrough in-addr.arpa ip6.arpa\\n ttl 30\\n }\\n hosts {\\n ${KEYCLOAK_IP} keycloak.example.com\\n ${ARGOCD_IP} argocd.example.com\\n fallthrough\\n }\\n reload\\n forward . /etc/resolv.conf {\\n max_concurrent 1000\\n }\\n cache 30\\n loop\\n reload\\n loadbalance\\n}\\n\"
}
]"
# 확인
kubectl get cm coredns -n kube-system -o yaml
...
hosts {
10.96.201.45 keycloak.example.com
10.96.74.42 argocd.example.com
fallthrough
}
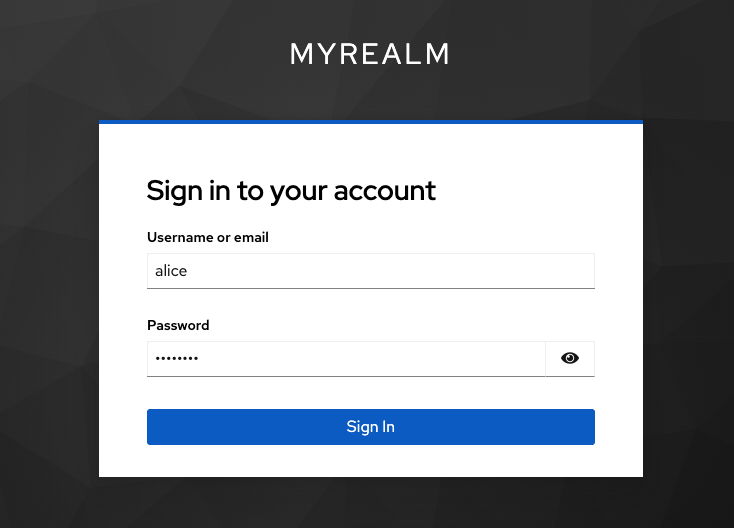
...위와 같이 설정 후 CoreDNS Pod가 자동으로 Reload 되며 다시 argocd에서 keycloak 으로 로그인하기를 누르면 아래와 같은 화면이 뜬다.
기존에 생성한 alice/alice123 비밀번호를 입력하고 접속한다.
Jenkins
kubectl create ns jenkins
cat <<EOF | kubectl apply -f -
apiVersion: v1
kind: PersistentVolumeClaim
metadata:
  name: jenkins-pvc
  namespace: jenkins
spec:
  accessModes:
    - ReadWriteOnce
  resources:
    requests:
      storage: 10Gi
---
apiVersion: apps/v1
kind: Deployment
metadata:
  name: jenkins
  namespace: jenkins
spec:
  replicas: 1
  selector:
    matchLabels:
      app: jenkins
  template:
    metadata:
      labels:
        app: jenkins
    spec:
      securityContext:
        fsGroup: 1000
      containers:
        - name: jenkins
          image: jenkins/jenkins:lts
          ports:
            - name: http
              containerPort: 8080
            - name: agent
              containerPort: 50000
          volumeMounts:
            - name: jenkins-home
              mountPath: /var/jenkins_home
      volumes:
        - name: jenkins-home
          persistentVolumeClaim:
            claimName: jenkins-pvc
---
apiVersion: v1
kind: Service
metadata:
  name: jenkins-svc
  namespace: jenkins
spec:
  type: ClusterIP
  selector:
    app: jenkins
  ports:
    - port: 8080
      targetPort: http
      protocol: TCP
      name: http
    - port: 50000
      targetPort: agent
      protocol: TCP
      name: agent
---
apiVersion: networking.k8s.io/v1
kind: Ingress
metadata:
  name: jenkins-ingress
  namespace: jenkins
  annotations:
    nginx.ingress.kubernetes.io/proxy-body-size: "0"
    nginx.ingress.kubernetes.io/proxy-read-timeout: "600"
spec:
  ingressClassName: nginx
  rules:
    - host: jenkins.example.com
      http:
        paths:
          - path: /
            pathType: Prefix
            backend:
              service:
                name: jenkins-svc
                port:
                  number: 8080
EOF

# 도메인 설정
echo "127.0.0.1 **jenkins.example.com**" **| sudo tee -a /etc/hosts**
jenkins의 경우 nginx.ingress proxy body size를 무제한으로 설정해준다
apiVersion: networking.k8s.io/v1
kind: Ingress
metadata:
  name: jenkins-ingress
  namespace: jenkins
  annotations:
    nginx.ingress.kubernetes.io/proxy-body-size: "0"
    nginx.ingress.kubernetes.io/proxy-read-timeout: "600"
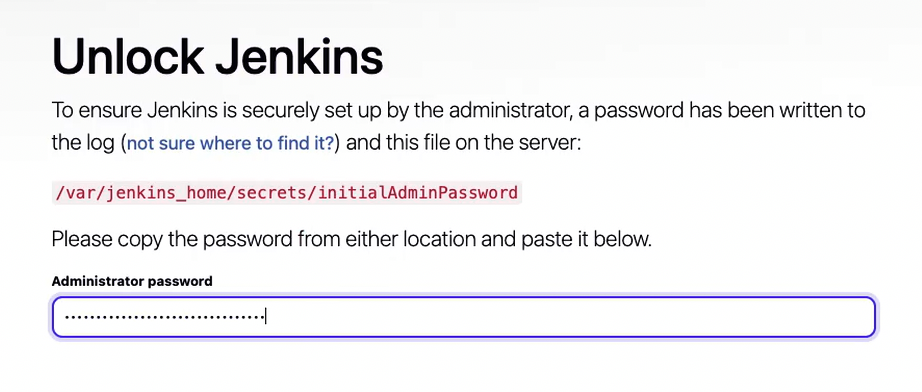
초기 암호를 확인한다.
kubectl exec -it -n jenkins deploy/jenkins -- **cat /var/jenkins_home/secrets/initialAdminPassword**
0ff6ec37578d420691e40a6bedc95a02
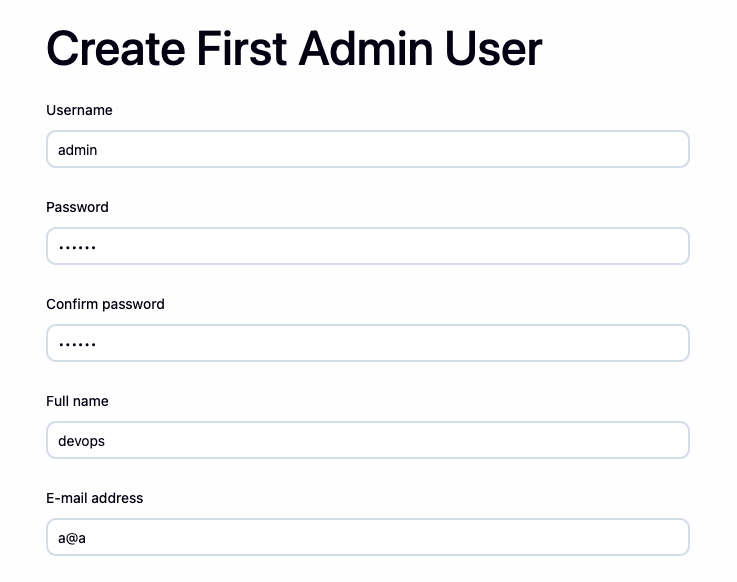
http://jenkins.example.com/ 에 접속하여 초기암호를 입력하고 설치를 진행해준다.
 |
 |
admin/qwe123 으로 암호를 설정한다.
 |
 |
jenkins도 동일하게 CoreDNS의 hosts 플러그인으로 클러스터 내부 IP 매핑을 해준다.
KEYCLOAK_IP=$(kubectl get svc -n default keycloak -o jsonpath='{.spec.clusterIP}' 2>/dev/null)
ARGOCD_IP=$(kubectl get svc -n argocd argocd-server -o jsonpath='{.spec.clusterIP}' 2>/dev/null)
JENKINS_IP=$(kubectl get svc -n jenkins jenkins-svc -o jsonpath='{.spec.clusterIP}' 2>/dev/null)

kubectl patch cm coredns -n kube-system --type json -p="[
  {
    \"op\": \"replace\",
    \"path\": \"/data/Corefile\",
    \"value\": \".:53 {\\n    errors\\n    health {\\n       lameduck 5s\\n    }\\n    ready\\n    kubernetes cluster.local in-addr.arpa ip6.arpa {\\n       pods insecure\\n       fallthrough in-addr.arpa ip6.arpa\\n       ttl 30\\n    }\\n    hosts {\\n       ${KEYCLOAK_IP} keycloak.example.com\\n       ${ARGOCD_IP} argocd.example.com\\n       ${JENKINS_IP} jenkins.example.com\\n       fallthrough\\n    }\\n    reload\\n    forward . /etc/resolv.conf {\\n       max_concurrent 1000\\n    }\\n    cache 30\\n    loop\\n    reload\\n    loadbalance\\n}\\n\"
  }
]"

# 확인
kubectl get cm coredns -n kube-system -o yaml
...
        hosts {
           10.96.201.45 keycloak.example.com
           10.96.74.42 argocd.example.com
           10.96.95.174 jenkins.example.com
           fallthrough
        }
...
jenkins도 keycloak을 통해서 사용자 인증처리하여 로그인 할 수 있도록 keycloak에 접속하여 아래의 정보로 client를 생성해준다.(argocd client 생성 화면 참조)
keycloak 에 jenkins 를 위한 client 생성
- client id : jenkins
- name : jenkins client
- Client authentication : Check
- Authentication flow : Standard flow
- Root URL : http://jenkins.example.com/
- Home URL : http://jenkins.example.com/
- Valid redirect URIs : http://jenkins.example.com/securityRealm/finishLogin
- Valid post logout redirect URIs : http://jenkins.example.com
- Web origins : +
- Client Secret 저장: SHxrUwabDXWc73xZy6OCNQwshQVDXqqH
http://jenkins.example.com/manage/pluginManager/available 에 접속하여 OpenID Connect Authentication plugins을 설치해준다**.**
재시작은 진행할 필요는 없다.

그런 다음 http://jenkins.example.com/manage/configureSecurity/ 으로 접속하여 keycloak 설정을 jenkins에 해준다.

- Login with Openid Connect
- Client id : jenkins
- Client secret : <keycloak 에서 jenkins client 에서 credentials>
- Configuration mode : Discovery…
- Well-know configuration endpoint http://keycloak.example.com/realms/**myrealm**/.well-known/openid-configuration
- Override scopes : openid email profile
- Logout from OpenID Provider : Check
- Security configuration
- Disable ssl verification : Check
Jenkisn Logout을 하고 다시 접속시 keycloak 로그인으로 redirect된다. keycloak user/password인 alice/alice123 을 입력하면 jenkins에 로그인이 된다.
Jenkins와 ArgoCD 두 군데에 로그인 하면 keycloak session에서 두 군데에 로그인된 것을 확인할 수 있다.

LADP 구성하기
LDAP 이란 사용자·그룹·권한 정보를 계층적으로 보관하는 “주소록/조직도” 이다. 사내에서 구성원 정보를 계층적으로 관리하는데 많이 사용된다.
실습으로는 OPEN LDAP을 설치한다. 아래 예제를 참조해서 설치해본다.
cat <<EOF | kubectl apply -f -
apiVersion: v1
kind: Namespace
metadata:
  name: openldap
---
apiVersion: apps/v1
kind: Deployment
metadata:
  name: openldap
  namespace: openldap
spec:
  replicas: 1
  selector:
    matchLabels:
      app: openldap
  template:
    metadata:
      labels:
        app: openldap
    spec:
      containers:
        - name: openldap
          image: osixia/openldap:1.5.0
          ports:
            - containerPort: 389
              name: ldap
            - containerPort: 636
              name: ldaps
          env:
            - name: LDAP_ORGANISATION    # 기관명, LDAP 기본 정보 생성 시 사용
              value: "Example Org"
            - name: LDAP_DOMAIN          # LDAP 기본 Base DN 을 자동 생성
              value: "example.org"
            - name: LDAP_ADMIN_PASSWORD  # LDAP 관리자 패스워드
              value: "admin"
            - name: LDAP_CONFIG_PASSWORD
              value: "admin"
        - name: phpldapadmin
          image: osixia/phpldapadmin:0.9.0
          ports:
            - containerPort: 80
              name: phpldapadmin
          env:
            - name: PHPLDAPADMIN_HTTPS
              value: "false"
            - name: PHPLDAPADMIN_LDAP_HOSTS
              value: "openldap"   # LDAP hostname inside cluster
---
apiVersion: v1
kind: Service
metadata:
  name: openldap
  namespace: openldap
spec:
  selector:
    app: openldap
  ports:
    - name: phpldapadmin
      port: 80
      targetPort: 80
      nodePort: 30000
    - name: ldap
      port: 389
      targetPort: 389
    - name: ldaps
      port: 636
      targetPort: 636
  type: NodePort
EOF
아래의 명령어를 통해 설치된 정보를 확인해본다.
kubectl get deploy,pod,svc,ep -n openldap
NAME                       READY   UP-TO-DATE   AVAILABLE   AGE
deployment.apps/openldap   1/1     1            1           31s

NAME                            READY   STATUS    RESTARTS   AGE
pod/openldap-54857b746c-t2rf2   2/2     Running   0          31s

NAME               TYPE       CLUSTER-IP      EXTERNAL-IP   PORT(S)                                    AGE
service/openldap   NodePort   10.96.232.206   <none>        80:30000/TCP,389:31842/TCP,636:31803/TCP   31s

NAME                 ENDPOINTS                                        AGE
endpoints/openldap   10.244.0.31:80,10.244.0.31:389,10.244.0.31:636   31s

# 기본 LDAP 정보 : 아래 Bind DN과 PW로 로그인
## Base DN: dc=example,dc=org
## Bind DN: cn=admin,dc=example,dc=org
## Password: admin
open <http://127.0.0.1:30000>

# phpLDAPadmin 로그인
kubectl krew install stern
kubectl stern -n openldap openldap-54857b746c-ch9g4
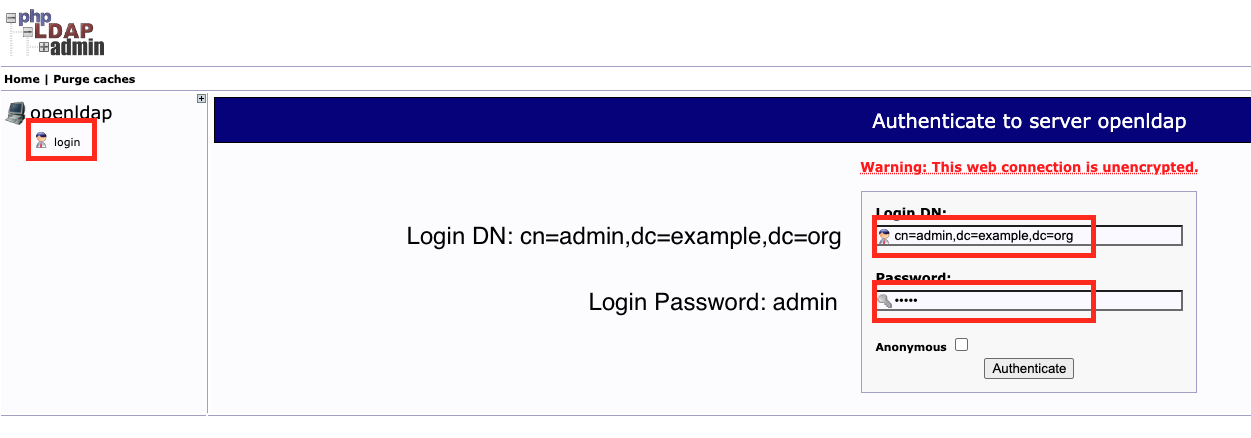
http://127.0.0.1:30000/ 로 접속하여 위와 같이 로그인한다.
만약 로그인이 안된다면 deployment를 삭제하고 재배포 해본다.
로그인이 성공하면 아래와 같은 화면을 볼 수 있다.

openldap 을 cli에서 구성해본다.
# ldap cli 접속
kubectl -n openldap exec -it deploy/openldap -c openldap -- bash

# pstree 출력
pstree -aplpst
run,1 -u /container/tool/run
  └─slapd,433 -h ldap://openldap-54857b746c-t2rf2:389 ldaps://openldap-54857b746c-t2rf2:636 ldapi:/// -u openldap -g openldap -d 256
      ├─{slapd},436
      ├─{slapd},437
      └─{slapd},438

# LDAP 관리자 인증 테스트 : 정상일 경우 LDAP 기본 엔트리 출력
ldapsearch -x -H ldap://localhost:389 -b dc=example,dc=org -D "cn=admin,dc=example,dc=org" -w admin
실습은 아래의 구조로 테스트를 합니다.
# 실습 사용 최종 트리 구조
dc=example,dc=org
├── ou=people
│   ├── uid=alice
│   │   ├── cn: Alice
│   │   ├── sn: Kim
│   │   ├── uid: alice
│   │   └── mail: alice@example.org
│   └── uid=bob
│       ├── cn: Bob
│       ├── sn: Lee
│       ├── uid: bob
│       └── mail: bob@example.org
└── ou=groups
    ├── cn=devs
    │   └── member: uid=bob,ou=people,dc=example,dc=org
    └── cn=admins
        └── member: uid=alice,ou=people,dc=example,dc=org
- user는 alice, bob을 사용합니다.
- group은 devs, admins 그룹을 사용합니다.
- ou(organizationalUnit) 은 people, groups 입니다.
위에 명시된 정보를 ldap에 생성하는 작업을 아래 스크립트에서 진행합니다. 기존에 접속한 ldap bash 환경에서 이어서 작업합니다.
# ldapadd로 ou 추가 (organizationalUnit)
cat <<EOF | ldapadd -x -D "cn=admin,dc=example,dc=org" -w admin
dn: ou=people,dc=example,dc=org
objectClass: organizationalUnit
ou: people

dn: ou=groups,dc=example,dc=org
objectClass: organizationalUnit
ou: groups
EOF
adding new entry "ou=people,dc=example,dc=org"
adding new entry "ou=groups,dc=example,dc=org"

# ldapadd로 users 추가 (inetOrgPerson) : alice , bob
cat <<EOF | ldapadd -x -D "cn=admin,dc=example,dc=org" -w admin
dn: uid=alice,ou=people,dc=example,dc=org
objectClass: inetOrgPerson
cn: Alice
sn: Kim
uid: alice
mail: alice@example.org
userPassword: alice123

dn: uid=bob,ou=people,dc=example,dc=org
objectClass: inetOrgPerson
cn: Bob
sn: Lee
uid: bob
mail: bob@example.org
userPassword: bob123
EOF
adding new entry "uid=alice,ou=people,dc=example,dc=org"
adding new entry "uid=bob,ou=people,dc=example,dc=org"

# ldapadd로 groups 추가 (groupOfNames) : devs, admins
cat <<EOF | ldapadd -x -D "cn=admin,dc=example,dc=org" -w admin
dn: cn=devs,ou=groups,dc=example,dc=org
objectClass: groupOfNames
cn: devs
member: uid=bob,ou=people,dc=example,dc=org

dn: cn=admins,ou=groups,dc=example,dc=org
objectClass: groupOfNames
cn: admins
member: uid=alice,ou=people,dc=example,dc=org
EOF
adding new entry "cn=devs,ou=groups,dc=example,dc=org"
adding new entry "cn=admins,ou=groups,dc=example,dc=org"

# ldapsearch 검색 : ou
ldapsearch -x -D "cn=admin,dc=example,dc=org" -w admin -b "dc=example,dc=org" "(objectClass=organizationalUnit)" ou

# ldapsearch 검색 : 사용자
ldapsearch -x -D "cn=admin,dc=example,dc=org" -w admin -b "ou=people,dc=example,dc=org" "(uid=*)" uid cn mail

# ldapsearch 검색 : 그룹/멤버 확인
ldapsearch -x -D "cn=admin,dc=example,dc=org" -w admin -b "ou=groups,dc=example,dc=org" "(objectClass=groupOfNames)" cn member


# LDAP 사용자 인증 테스트 : 정상일 경우 LDAP 기본 엔트리 출력
ldapwhoami -x -D "uid=alice,ou=people,dc=example,dc=org" -w alice123
dn:uid=alice,ou=people,dc=example,dc=org
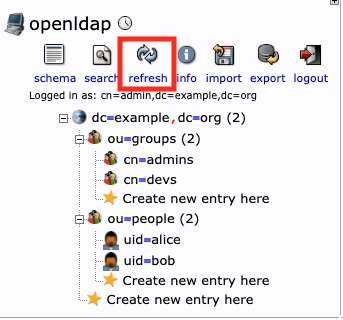
설정이 정상적으로 되면 LDAP UI에서 Refresh 버튼을 클릭하면 아래와 같이 볼 수 있습니다.
Keycloak에서 LDAP 구성하기
keycloak과 ldap을 구성합니다. 유저를 keycloak이 아닌 ldap에서 생성하고 관리합니다. keycloak은 User Federation 으로 LDAP과 연동하여 사용자 정보를 동기화합니다.
설정 중간에 Test 버튼을 클릭하여 정상 연동됨을 확인합니다.
 |
 |
 |
설정 값은 아래와 같습니다.
- General
- UI display name: ldap
- Vendor: Other
- Connection and authentication
- Connection URL: ldap://openldap.openldap.svc:389 ⇒ Test connection
- Bind DN: (= Login DN) cn=admin,dc=example,dc=org
- Bind Credential: admin ⇒ Test authentication
- LDAP searching and updating
- Edit mode: WRITABLE
- Users DN: ou=people,dc=example,dc=org
- Username LDAP attribute: uid
- RDN LDAP attribute: uid
- UUID LDAP attribute: uid
- User Object Classes: inetOrgPerson
- Search scope: Subtree (OU 하위 모두 탐색)
- Synchronization settings
- Import Users: On (LDAP → KeyCloak : Sync OK)
- Sync Registrations: Off (KeyCloak → LDAP : Sync OK)
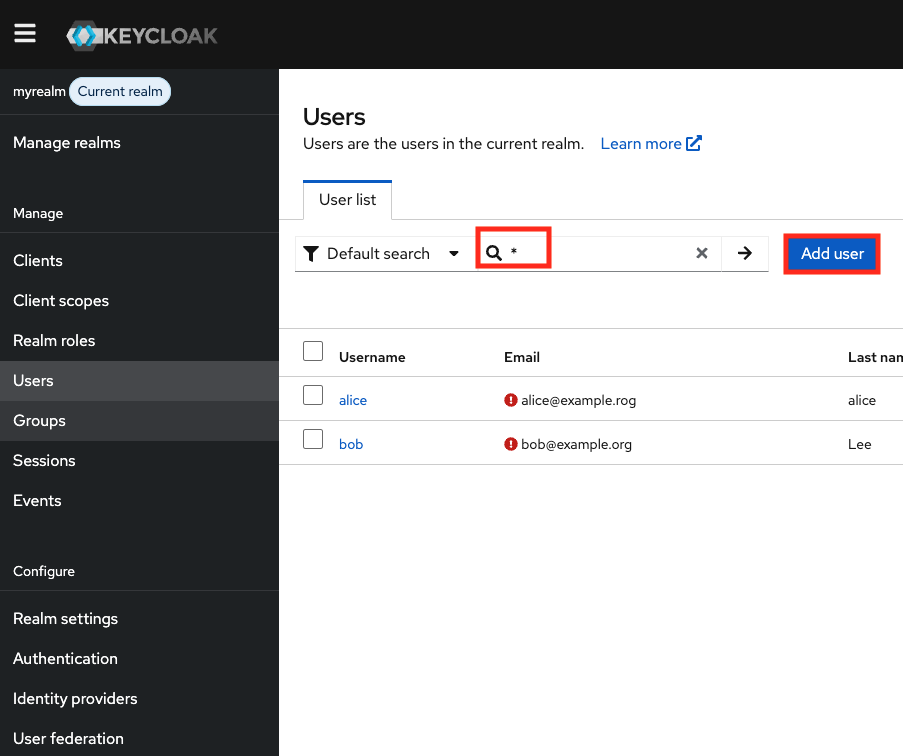
위와 같이 설정하고 Keycloak에서 Users에서 전체 검색 시 LDAP에 등록된 유저가 연동됨을 확인 할 수 있습니다.
Bob 유저의 상세정보를 아래와 같이 Federation link 가 LDAP으로 설정됨을 볼 수 있습니다.
 |
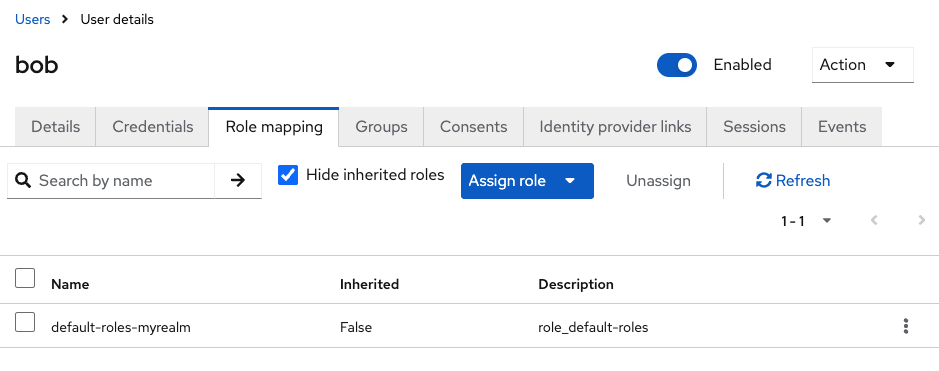 |
만약 보이지 않는다면 User Federation → LDAP Provider 선택 → Settings → Action : Sync all users 를 해봅니다.

유저 연동됨을 확인했으니 ArgoCD와 Jenkins으로 이동하여 bob 유저로 로그인해봅니다.
bob(암호: bob123) 를 입력하고 정상적으로 로그인 되는지 확인합니다. 로그인 된다면 ldap → keycloak 연동이 완료됨을 확인할 수 있습니다.
alice(암호: alice123) 도 동일하게 테스트 해줍니다.
새로운 유저인 jack(암호: jack123) 도 추가해서 로그인 해봅니다.
cat <<EOF | ldapadd -x -D "cn=admin,dc=example,dc=org" -w admin
dn: uid=jack,ou=people,dc=example,dc=org
objectClass: inetOrgPerson
cn: Jack
sn: Hong
uid: jack
mail: jack@example.org
userPassword: jack123
EOF
위와 같이 ldap user를 생성하고 로그인하면 정상적으로 로그인 됨을 확인 할 수 잇습니다.
ArgoCD에 LDAP User 권한 연동
argocd 에 sample application을 배포하고 조회가 되는지 테스트 해보겠습니다. 아래 스크립트로 샘플 애플리케이션을 배포해줍니다.
cat https://github.com/hanship0530/Learning
        targetRevision: HEAD
        path: ci-cd-cookbook/6w/guestbook
      destination:
        server: '{{.server}}'
        namespace: guestbook
      syncPolicy:
        syncOptions:
          - CreateNamespace=true
EOF

# sync
argocd app sync -l managed-by=applicationset

# 생성된 application yaml 확인
kubectl get applications -n argocd in-cluster-guestbook -o yaml | k neat | yq
kubectl get applications -n argocd dev-k8s-guestbook -o yaml | k neat | yq
kubectl get applications -n argocd prd-k8s-guestbook -o yaml | k neat | yq

# 각 k8s 에 배포된 파드 정보 확인
k8s1 get pod -n guestbook
k8s2 get pod -n guestbook
k8s3 get pod -n guestbook
jack 유저로 로그인해서 확인해보겠습니다.
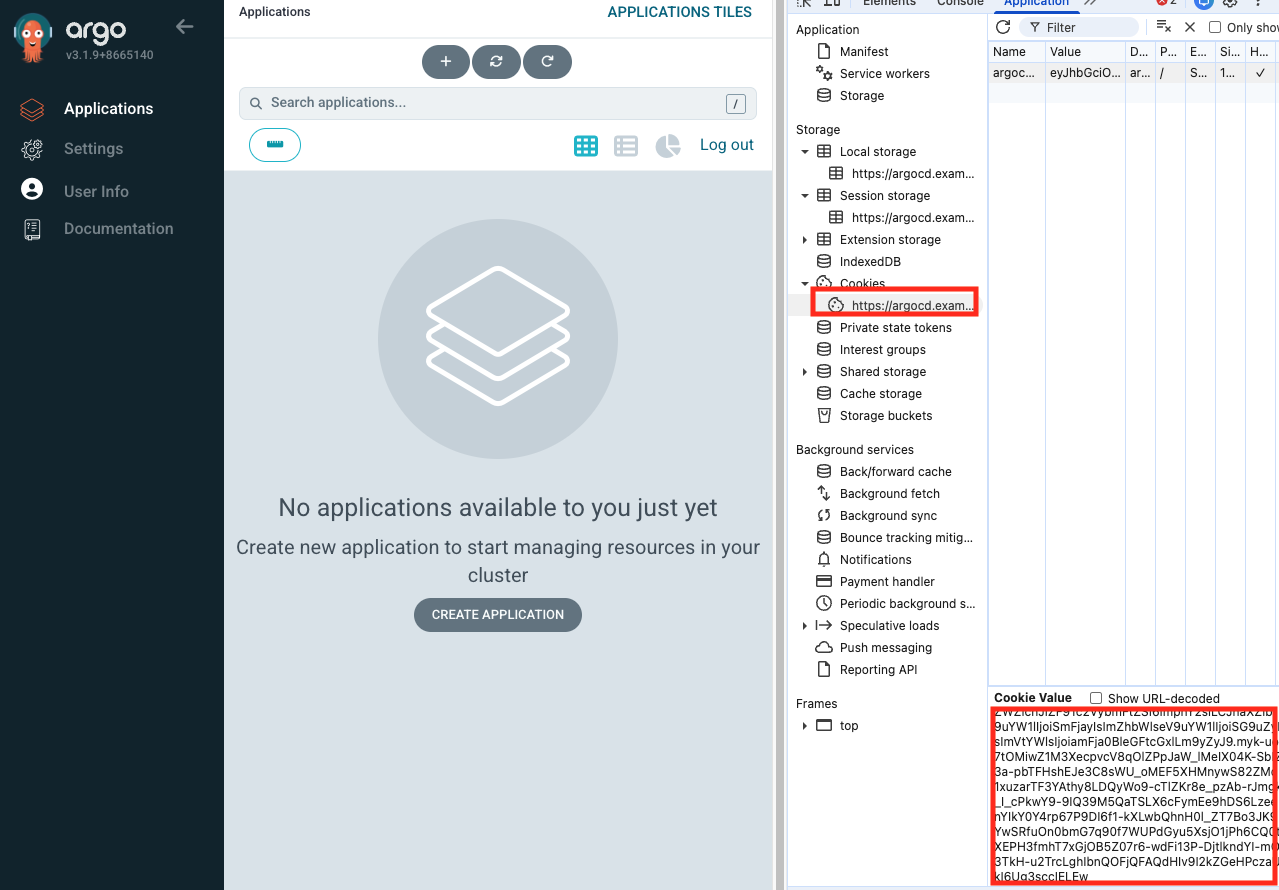
로그인 시 아무것도 보이지 않습니다. Cookie에 등록된 jwt 정보를 확인해봅니다.
https://www.jwt.io/ 해당 값을 입력해서 확인해보면 User는 Jack인것을 확인할 수 있습니다.
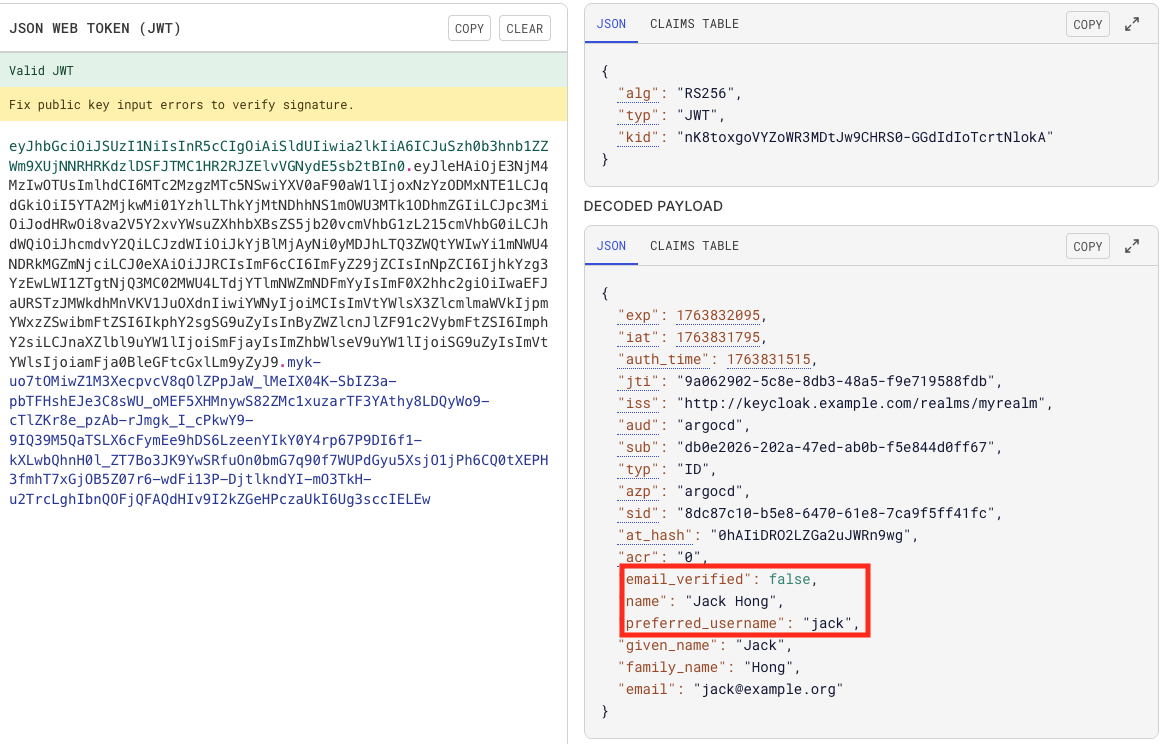
현재 배포된 애플리케이션이 안보이는 이유는 Keycloak에 아무런 Group 정보가 연동이 안되어서 그렇습니다.
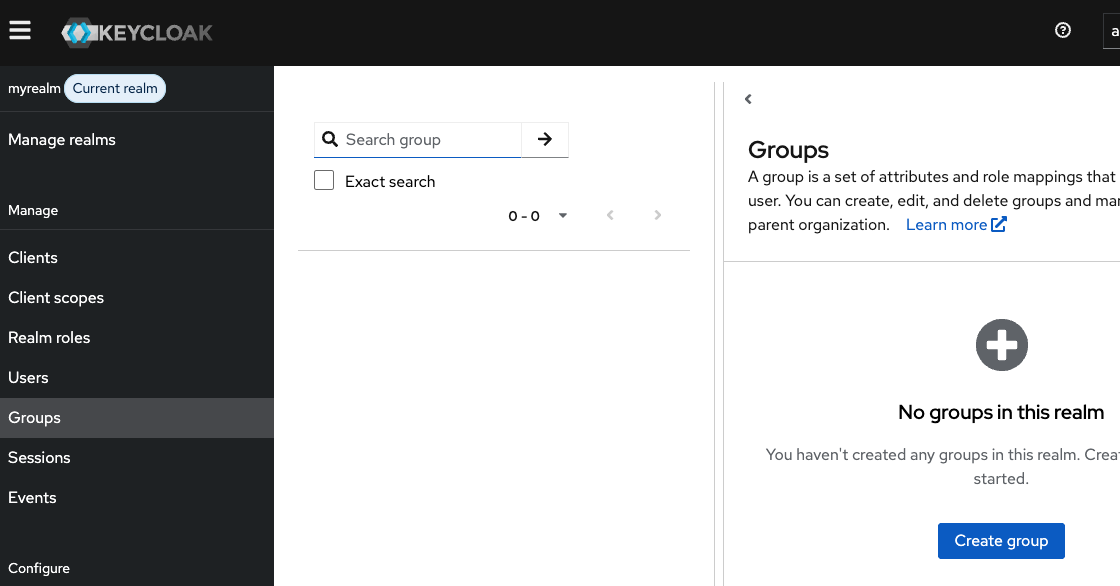
Keycloak에서 admin으로 접속하여 Group를 연동해줍니다.

- User Federation → LDAP Provider 선택 → Mappers → Add mapper → 아래 설정 후 Save
- name : ldap-groups
- Mapper type: group-ldap-mapper
- LDAP Groups DN : ou=groups,dc=example,dc=org
- Group Name LDAP Attribute: cn
- Group Object Classed: groupOfNames
- Membership LDAP attribute: member
- Membership attribute type: DN
- Mode: READ_ONLY
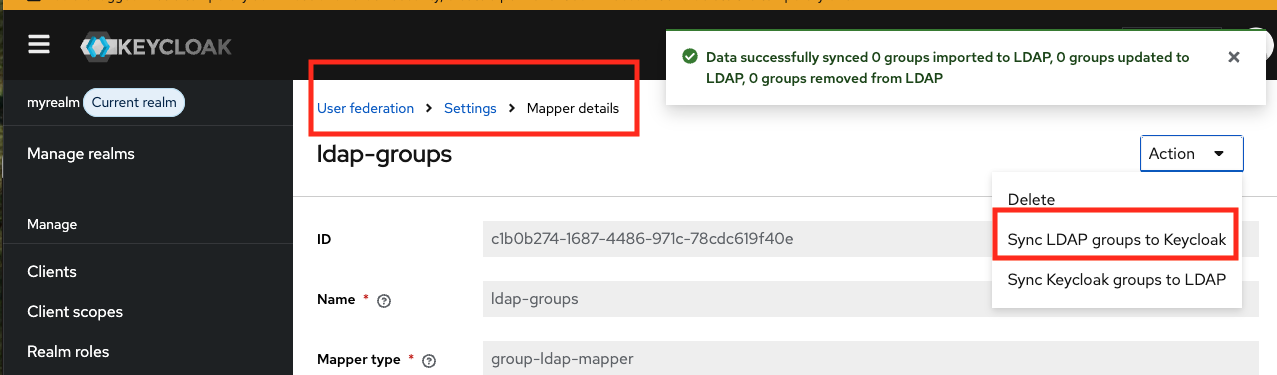
위와 같이 설정하고 User federations → LDAP → Mappers → ldap-groups 선택 → Action → Sync LDAP groups to Keycloak 클릭해줍니다. 그리고 Group을 확인합니다.
 |
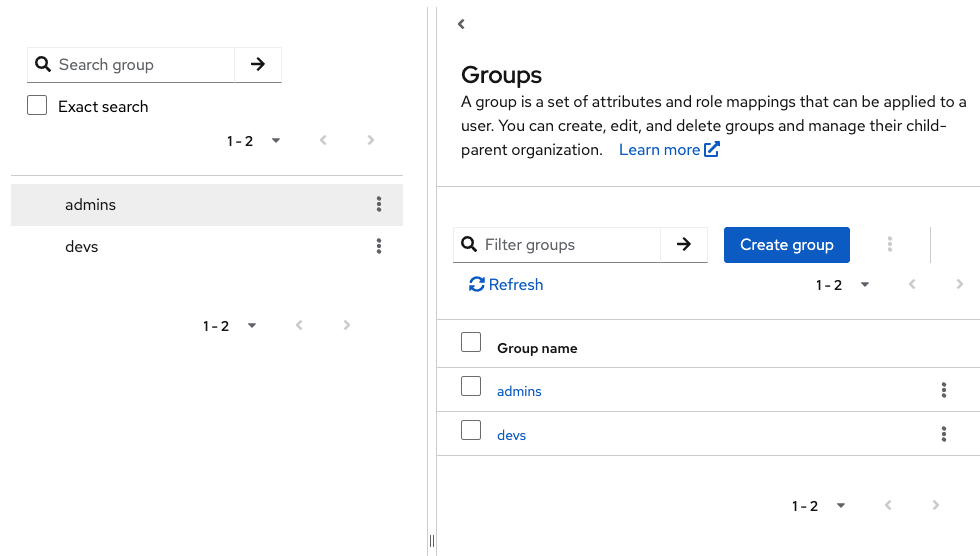 |
그런 다음 Keycloak 에서 토큰에 Group 전달을 위한 설정 : ArgoCD Client 설정을 해줍니다.
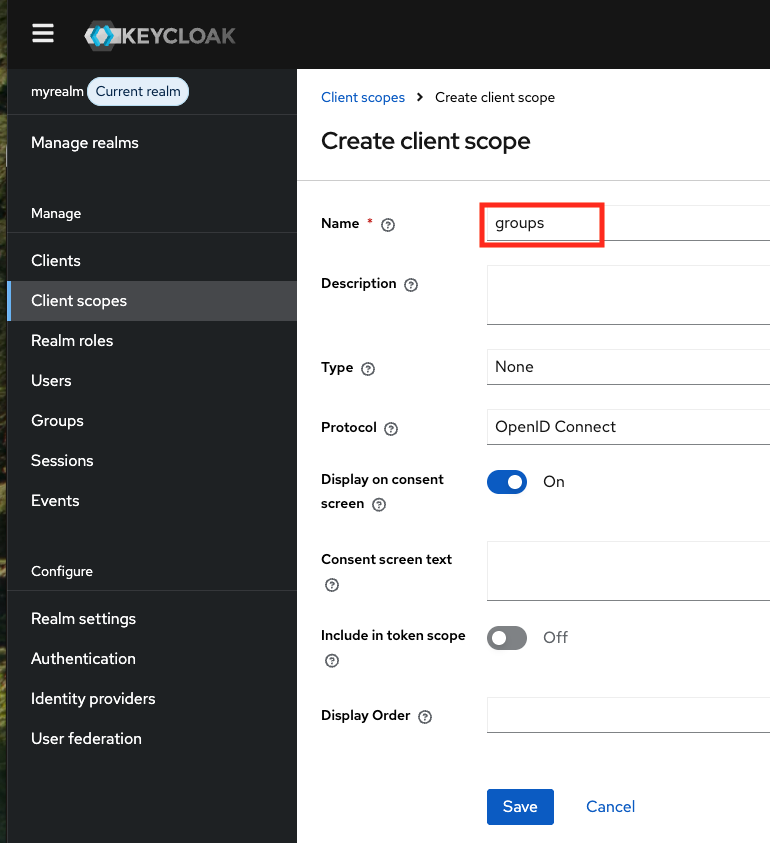
- Client Scoups 생성 : Name (groups) , 나머지는 기본값
그런 다음 해당 client scopes 에서 mappers 클릭 → [Configure a new mapper] 클릭 한 후 mapper 리스트가 나타나면 'Group Membership' 선택 후 Name, Token Claim Name 에 groups 입력
 |
 |
argocd client 에서 groups 전달을 위한 설정을 합니다. : client 에서 argocd 클릭
- [Client scopes] 탭 이동 후, Add client scope 클릭 후 생성한 groups를 선택합니다. 이때, [Add] 선택 후 드롭다운의 Default를 선택.

위와 같이 설정 이후 Argo CD에 scope 에 groups 추가 설정을 진행하고 나서 로그아웃 후 로그인 시도를 해봅니다. (적용을 위해서 15초 정도 후에 아래 로그인 진행 합니다.)
Keycloak → Sessions → jack signout 을 해줍니다.
kubectl edit cm -n argocd argocd-cm
...
    requestedScopes: ["openid", "profile", "email" , "groups"]
...
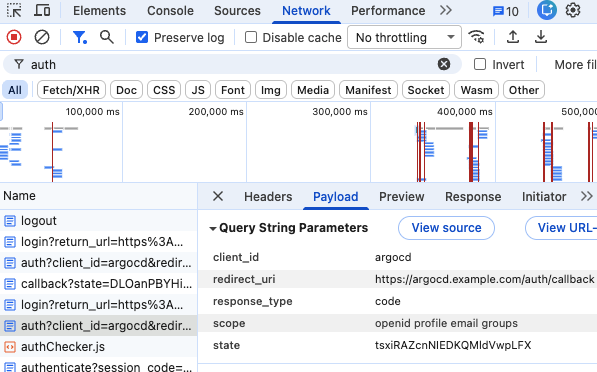
로그인 후 auth? 에서 scope에 groups가 추가된것을 확인합니다.
그런 다음 jack 계정으로 app 조회를 하기 위해 아래의 작업을 진행해줍니다.
Argo CD RBAC 할당 합니다. (Keycloak 그룹 ArgoCDAdmins에 ArgoCD 권한을 매핑하기 위해 argocd-rbac-cm 컨피그맵을 업데이트)
kubectl edit cm argocd-rbac-cm -n argocd
...
data:
  policy.csv: |
    g, devs, role:admin
...
해당 설정 후 bob으로 로그인 시 app이 보이지만 jack의 경우 안보입니다. Keycloak 을 확인해보면 Jack은 dev group에 추가가 안된 것을 볼 수 있습니다.
Ldap에서 추가해줍니다.
# ldap cli 접속
kubectl -n openldap exec -it deploy/openldap -c openldap -- bash
cat <<EOF | ldapmodify -x -D "cn=admin,dc=example,dc=org" -w admin
dn: cn=devs,ou=groups,dc=example,dc=org
changetype: modify
add: member
member: uid=jack,ou=people,dc=example,dc=org
EOF
위와 같이 한 후 User federation → ldap → Mappers → ldap-groups → Action → Sync LDAP groups to Keycloak 을 클릭하여 동기화를 진행해줍니다.
위와 같이 한 후 User federation → ldap → Settings → Action → Sync all users 을 클릭하여 동기화를 진행해줍니다.
이후 Keyclaok Groups에 devs 의 Members를 확인해보면 jack 추가된 것을 볼 수 있습니다. Jack User 정보에서도 Group에 추가됬는지 확인을 해줍니다.

Session에서 Jack을 Sign out 시킨 후 다시 로그인을 하면 dev-k8s-guestbook을 확인 할 수 있습니다.

LDAP + Keyclaok 으로 사용자 인증을 구현하고 Jenkins, ArgoCD에 접근을 제어하는 설정을 진행해보았습니다.
실습한 모든 클러스터를 삭제합니다.
kind get clusters | xargs -I {} kind delete cluster --name {}
'스터디 > [gasida] ci-cd 스터디 1기' 카테고리의 다른 글
| Image Build (0) | 2025.12.05 |
|---|---|
| Vault (0) | 2025.11.26 |
| ArgoCD ApplicationSet (0) | 2025.11.23 |
| Arocd Rollout (0) | 2025.11.16 |
| ArgoCD + Ingress + Self Managed (0) | 2025.11.16 |